Creating a Keymap
Keymaps can be defined in Harlequin config files, under the keymaps key. You can create these keymaps manually in a text editor, or by using the Harlequin Keys App.
What is a Keymap?
In a config file, a keymap is an “array of tables”, where each table defines a key binding. A simple keymap looks like this:
[[keymaps.more_arrows]]
keys="w"
action="results_viewer.cursor_up"
key_display="⬆/w"

[[keymaps.more_arrows]]
keys="a"
action="results_viewer.cursor_left"
key_display="⬅/a"

[[keymaps.more_arrows]]
keys="s,j"
action="results_viewer.cursor_down"
key_display="⬇/s/j"

[[keymaps.more_arrows]]
keys="d"
action="results_viewer.cursor_right"
key_display="➡/d"
This keymap is named more_arrows, and it maps the keys w, a, s, j, and d to actions that move the cursor in the Results Viewer. The arrow keys are already mapped to these actions in the default keymap, so this keymap is a good example of extending the default keymap.
The items in each table are as follows:
Keys
The keys item is a string that must be a comma-separated list of Textual virtual key names. These are usually intuitive names like enter and ctrl+f, but depending on your terminal and shell, many keypresses will be aliased to different key names by the time they reach Harlequin. The best way to ensure the correct key name is to use the Keys App.
Action
The action item is a string that must be equal to the name of a Harlequin Action. A full list of action names can be found in the Harlequin source code. All actions are also listed (with aliased/formatted names) in the Keys App.
Actions are context-specific, so they are already scoped to either the entire app or a specific widget. Those that are scoped to a widget have names that take the form <widget_name>.<action_name>.
Key Display
Harlequin’s Footer can display currently-active (in-scope) key bindings. Many bindings are hidden by default. By including a key_display item in each table, Harlequin will show the binding, optionally with a custom symbol.
Keys App
Harlequin ships with an app that makes it easy to create your own custom keymap. To start the app, start harlequin with the --keys option:
$ harlequin --keysThe app will load the currently-active config (from discovered TOML files, in the same manner as Harlequin) and show a list of all configured key bindings (using the default profile and its specified keymaps). You can load the Keys App with options that specify a config file, profile, and/or keymap name if you would like, using command-line options:
$ harlequin --config-path ~/my-config.toml --profile Foo --keys Tip
Tip--config-path, --profile, --keymap-name, and --theme options must be declared before the --keys option for this to work.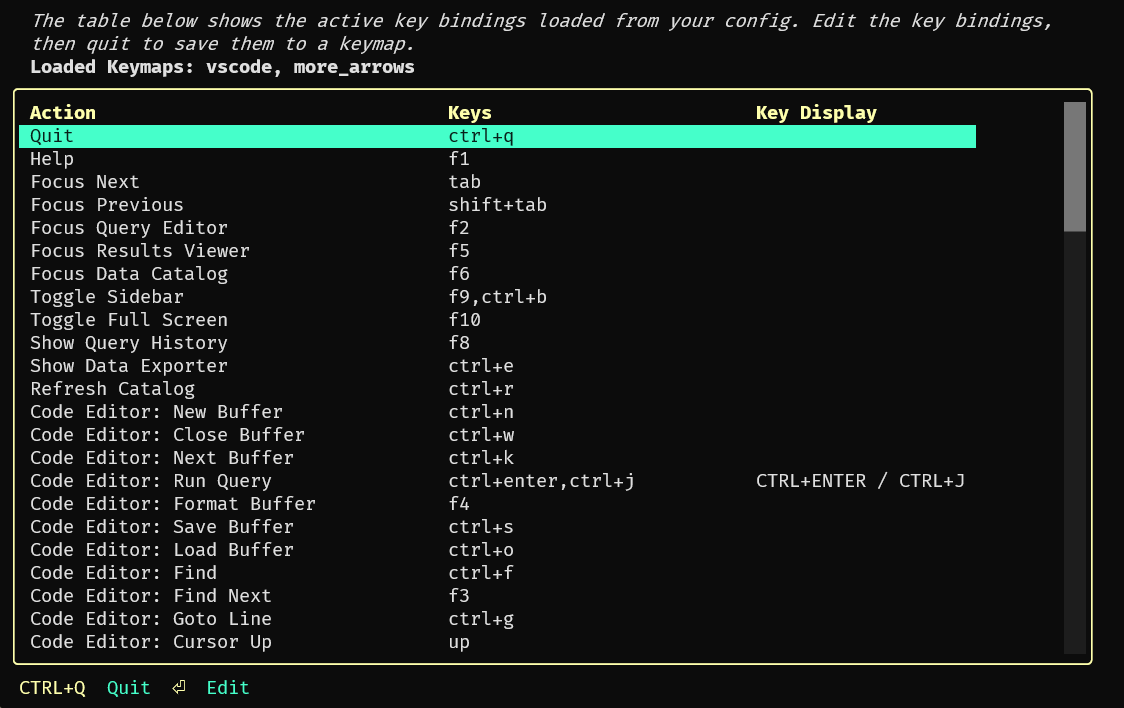
In the app, you can use the arrow keys to scroll up and down the list of bindings, then press enter to edit a binding. You can replace an existing key, or add or remove keys that are bound to each action by using the buttons in the Edit modal.
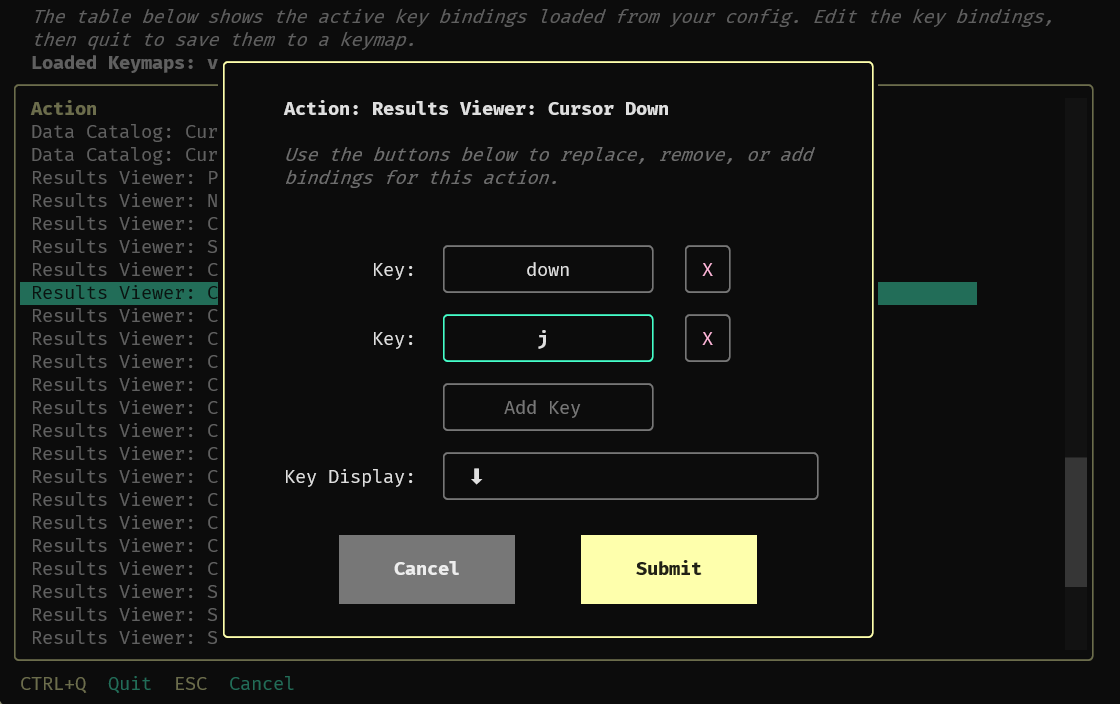
After editing bindings, press ctrl+q to quit the Keys App. You will be prompted for a config file location and a keymap name. Remember this name — you will need it in the next step, when configuring Harlequin to use your keymap. If you select “Save + Quit,” Harlequin will write the full keymap to the location you specify.